Changing Branding and Interface Settings
This chapter describes how to select Plesk's interface language, prohibit multiple sessions under your account, select the interface view, rebrand Plesk, and add links to external sites or web applications.
Change Interface Language
In addition to English (United States), Plesk can be viewed in a number of other languages. See the full list of supported languages in the Localization Guide.
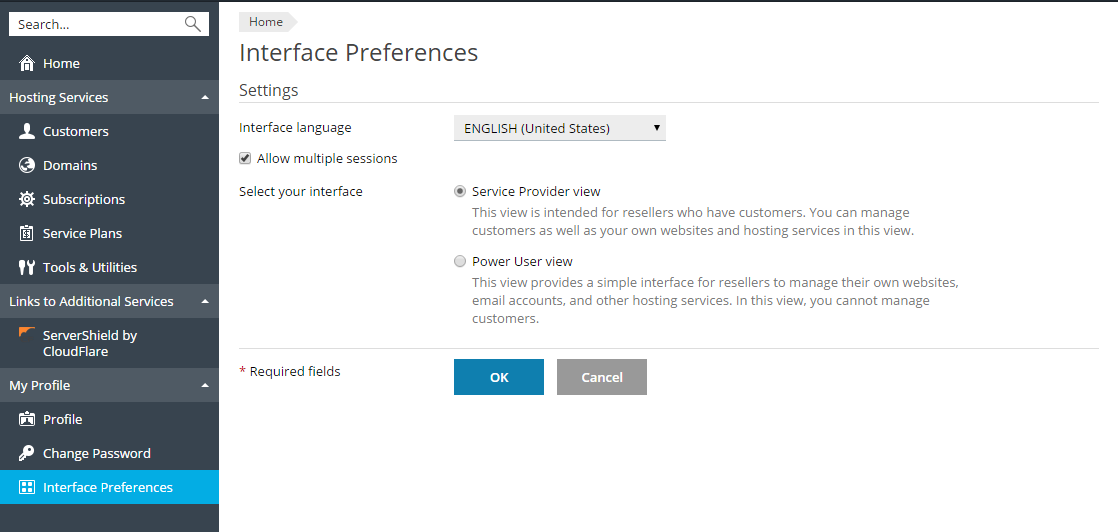
If you want to switch Plesk to any of these languages, go to My Profile > Interface Preferences.
Prohibiting Multiple Sessions Under Your Account
By default Plesk allows multiple simultaneous sessions for several users logged in to Plesk using the same login and password combination. This can be useful when delegating management functions to other users or in case if you accidentally close your browser without logging out, thus becoming unable to log in again until your session expires. If you do not need this capability, to switch it off, go to My Profile > Interface Preferences and clear the Allow multiple sessions checkbox.
Changing Plesk View
Depending on your goals, Plesk provides two different views you can choose from when working with Plesk:
- Select Service Provider if you use Plesk for selling web hosting services.
- Select Power User if you use Plesk for you own needs, for example, to manage your own websites, email accounts, and other services.
Read more about the views in Interface Views.
To quickly change your view, go to My Profile > Interface Preferences and select your interface.
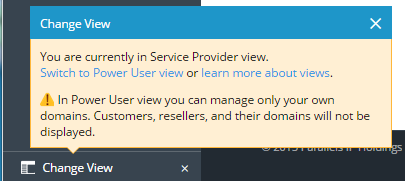
You also can quickly change the interface view by clicking Change View in the left bottom part of the page.
Add Branded Content
To disguise the fact that you are reselling another company's hosting resources, you can add your own branded content to Plesk. Specifically, this content may be the following:
- The logo in the top left corner. Upload your own logo and your customers will see this instead of the original Plesk logo in the Customer Panel. Use a GIF, JPEG, or PNG file for your logo, preferably not larger than 100 kilobytes to minimize the download time. To ensure that your logo will fit into the top area, we recommend that you use an image 50 pixels in height.
- The URL to which the logo points. Make your logo a clickable link that points to your company's website to let your customers easily open the website any time they are in the Customer Panel.
- The pages title. Let your customers see your company name or other relevant text in their browsers' title bars when they work in the Customer Panel.
To change any of these settings, go to Tools & Utilities > Plesk Branding.
Add Links to Websites and Applications
If you want to have quick access from Plesk to certain websites and applications, or wish to provide your customers with such access, create custom buttons. The buttons may lead to web resources, such as your corporate site, or to a web application that can process online requests and accept additional information about the users clicking the buttons. You can place these buttons on your Home page for yourself or in the Customer Panel for your customers.
You can place the buttons in the following locations of the Reseller Panel and the Customer Panel, and decide who should be able to see them:
- On the Home page in the Reseller Panel, visible only to you. This is achieved by selecting the Reseller's Home page option in the button properties.
- On the start page the Customer Panel, visible to the hosting service customers and their users who are allowed to log in to the Customer Panel. This is achieved by selecting the Customer's Home page option in the button properties.
- On the Websites & Domains section in the Customer Panel, visible to the hosting service customers and their users who are allowed to log in to the Customer Panel. This is achieved by selecting the Websites & Domains page of Subscription option in the button properties.
- In the website tools area on the Websites & Domains section in the Customer Panel, visible to the hosting service customers and their users who are allowed to log in to the Customer Panel. This is achieved by selecting the Websites Tools option in the button properties.
- On the Tools & Utilities page in the Reseller Panel, visible only to you. This is achieved by selecting the Reseller's Tools & Utilities page option in the button properties.
- On the Home page in the Reseller Panel and Customer Panel, visible to you and your customers. This is achieved by selecting the Common access option in the button properties.
You can specify what information about users should be passed:
- Subscription ID, domain ID, and domain alias ID.
- Primary domain name associated with a subscription.
- FTP account username and password.
- Customer's account ID, name, email, and company name.
To add a custom hyperlink button to the Reseller Panel or the Customer Panel:
- Go to Tools & Utilities > Custom Buttons (in the Plesk Management group), and click Create Custom Button.
- Specify the following properties of the button:
- Type the text that will show on your button in the Button label box.
- Choose the location for your button.
- Specify the priority of the button. Your custom buttons will be arranged in the Plesk in accordance with the priority you define: the lower the number, the higher the priority. Buttons are placed in the left-to-right order.
- To use an image for a button background, click Browse to browse for the desired file. It is recommended that you use a 16x16 pixel GIF or JPEG image for a button to be placed in the navigation pane, and a 32x32 pixels GIF or JPEG image for a button placed in the main frame.
- Type the hyperlink to be attached to the button into the URL box.
- Using the checkboxes, specify whether you want the customer information and other data to be transferred within the URL. These data can be used for processing by external web applications.
- In the Tooltip text input field, type in the help tip that will be displayed when users place the mouse pointer over the button.
- Select the Open URL in Plesk checkbox if you want the destination URL to be opened in the main frame of the Plesk; otherwise, leave this checkbox cleared to open the URL in a separate browser window or tab.
- If you want to make this button visible only to you, select the Show to me only checkbox.
- Click Finish to complete creation.
To remove a custom button from the Plesk, go to Tools & Utilities > Custom Buttons (in the Plesk Management group), select the corresponding checkbox and click Remove.